
Transfer Application
TRANSFER APPLICATION
NEWSPRINT TRANSFER HOW-TO:
In theory the transfer process is very simple but it has its little tricks and variables so we encourage you to take the time to experiment on a variety of test tiles, especially if this is your first time. Check out our Notes to Ensure Success page for more info.
Below is a step-by-step guide on how to transfer onto a flat surface as well as onto sculpture or pottery.
UPDATE: for greater success and release of imagery off of paper please refer to our videos section.
Materials to have at hand:
• LEATHER-HARD CLAY (Preferably “chocolate bar” leather hard)
• ISLA BASIC WHITE SLIP (buy slip) OR ANY OTHER SLIP YOU MIGHT WANT TO EXPERIMENT WITH.
• SOFT SLIP BRUSH, 1-2 INCHES
• SMALL SOFT BRISTLE BRUSH (OPTIONAL)
• HEAT GUN/ HAIR DRYER (OPTIONAL– CAN HELP SPEED UP PROCESS)
• WATER MISTER OR HAIR SPRAY BOTTLE (a fine mist is preferred — Try a flairosol hairspray bottle)
• RED / YELLOW MUDTOOLS RIBS
• SCISSORS
• WOODEN ROLLER (OPTIONAL)
TRANSFERRING ONTO A FLAT SURFACE
Apply slip on clay and on Isla Transfer: Brush approximately two generous coats
of slip onto the surface of the clay and one light coat
of slip onto the Isla Transfer, after misting the printed side of the sheet with water. The moisture of
the slip and mist will rehydrate the ink and allow it to lift off.
For more detailed instructions
read below:
1. With a brush, apply an even coat of slip to leather-hard clay.
Let the slip set until the glossy shine lessens to look more suede-like. Use a heat
gun or hair dryer if you wish to speed things along.
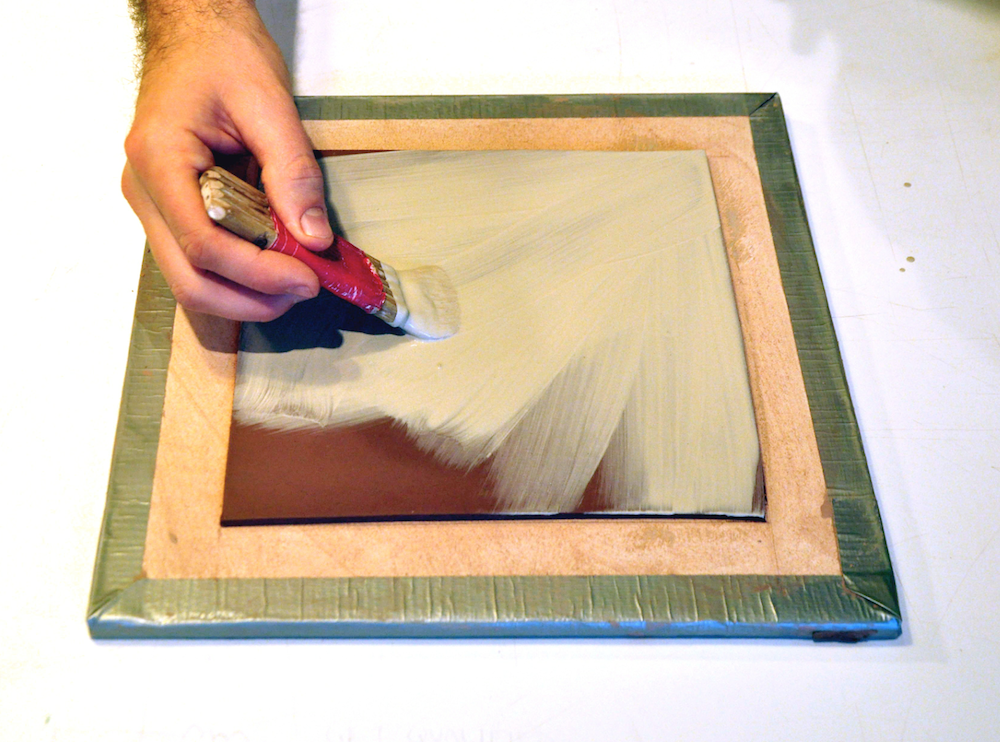
PHOTO A: Applying slip to leather hard clay
2. While the slip is setting, brush one or two coats of slip on top of the
Isla Transfer (We recommend you cut a little bit of extra material to have a place for your fingers to hold onto the sheet.)
Let that set until it too loses the glossy shine. If the slip dries
completely, it may chip off the paper.

Photo B: Applying slip to Isla Transfer
3. When both the clay site and the slipped transfer sheet have a slight sheen (a non-glossy, moist
surface), lift the corners of the Isla Transfer and carefully apply its slipped surface to the
clay surface. Summon the experiences of applying contact paper to a notebook in grade school!
Once the Isla Transfer touches the clay surface, do not readjust!

Photo C: Applying Isla Transfer to clay surface
4. Pat the Isla Transfer gently in place with your fingertips or a sponge and let sit for a
minute.
Tip: Have a small hair spray bottle (a.k.a. water mister) of water available
to mist any dry spots on the back of the newsprint.
5. With the red rib tool (soft rubber), burnish the Isla Transfer while also gently guiding out as
many air pockets as possible.If you are applying to sculptural pieces with uneven surfaces, using a make-up
sponge or a soft brush to gently guide the transfer into place works well. Let it set for another minute or two.

Photo D: Red rib burnishing
6. Use the tip of a pin, needle tool or x-acto knife to make small piercings in any remaining air pockets. This
will remove bubbles and not destroy the image. Burnish again. At this point you might want to introduce
the stiffer yellow rib or the wooden roller.

Photo E: Wooden roller in action
7. Apply heat to the back of your Isla Transfer as it lies on the clay for a few
seconds with a hair dryer or heat gun until the newsprint achieves a semi-moist surface.
8. Slowly peel back one corner and check to see if the image is releasing off
the Isla Transfer paper (photo F). If so, begin peeling the rest off. If not, place
corner back on the clay, repeat step 5 and peel back again. If certain spots are
not sticking, carefully place the paper down once more and gently burnish until
the complete image transfers to the clay (photo G).
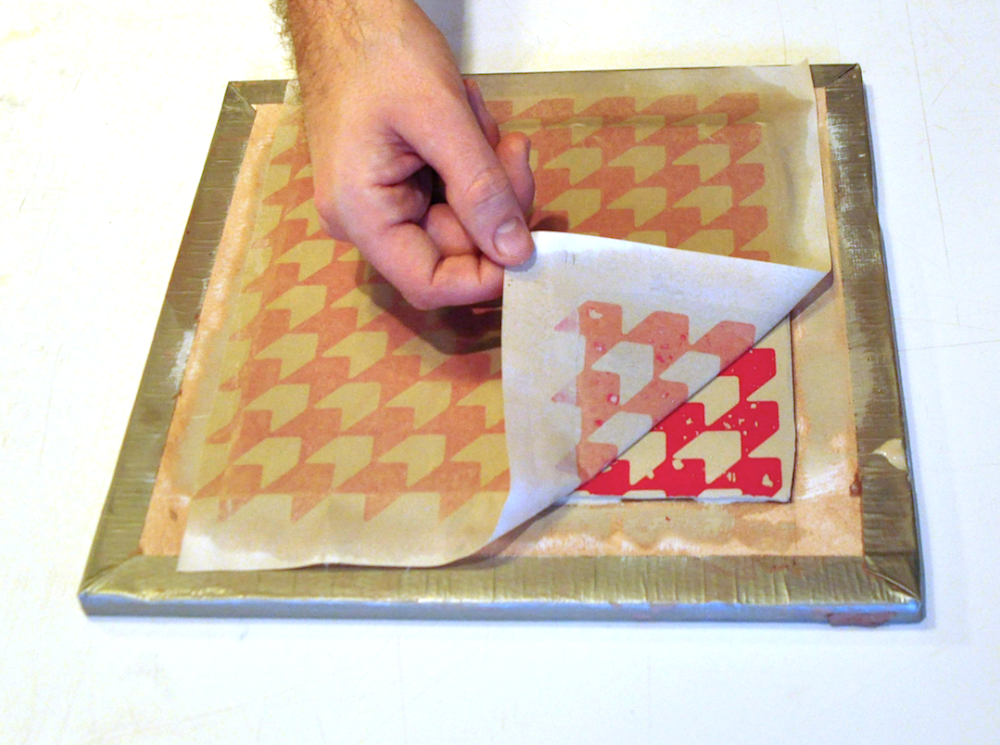
Photo F: Checking corner of print transfer

Photo G: Image Transfer on clay tile
APPLICATION VARIATIONS:
AP SLIP ON CLAY AND REHYDRATING ISLA TRANSFER WITH WATER:
You can transfer onto uneven surfaces by rehydrating Isla Transfers with water and applying slip only to
the clay. This helps reduce bubbles, which are more common on uneven or textured surfaces.
1. Brush approximately three generous coats of slip onto a clay surface
and lightly mist water on the printed side of the Isla Transfer sheet. We
recommend allowing the ink to fully absorb the moisture and misting once or twice
more (the moisture will rehydrate the ink and allow it to lift off easier). Once the
Isla Transfer is ready, apply it to the surface, sponge/burnish into place, and mist again
all over to ensure the moisture has absorbed through the paper. Look for dry
spots (photo H)! These mean the image hasn’t become fully rehydrated. Burnish
again and peel away slowly to check transfer accuracy.

Photo H: Dry spots on transfer sheet
MULTI-COLORED MONOPRINTS USING ISLA SLIPS
Using multiple slips you can color in particular areas of an Isla Transfer with a smaller soft bristle brush.
Our “Flechas” and “Cubos” transfers are great for this method!
Apply about three coats of slip (or less – your choice) and let the slip lose its glossy shine (photo I).
When finished applying colors use one of the previous transfer methods described to apply the Isla
Transfer to the clay surface. When finished you’ll see that the colors you brushed
in rest between the printed image and your background color (photo J).
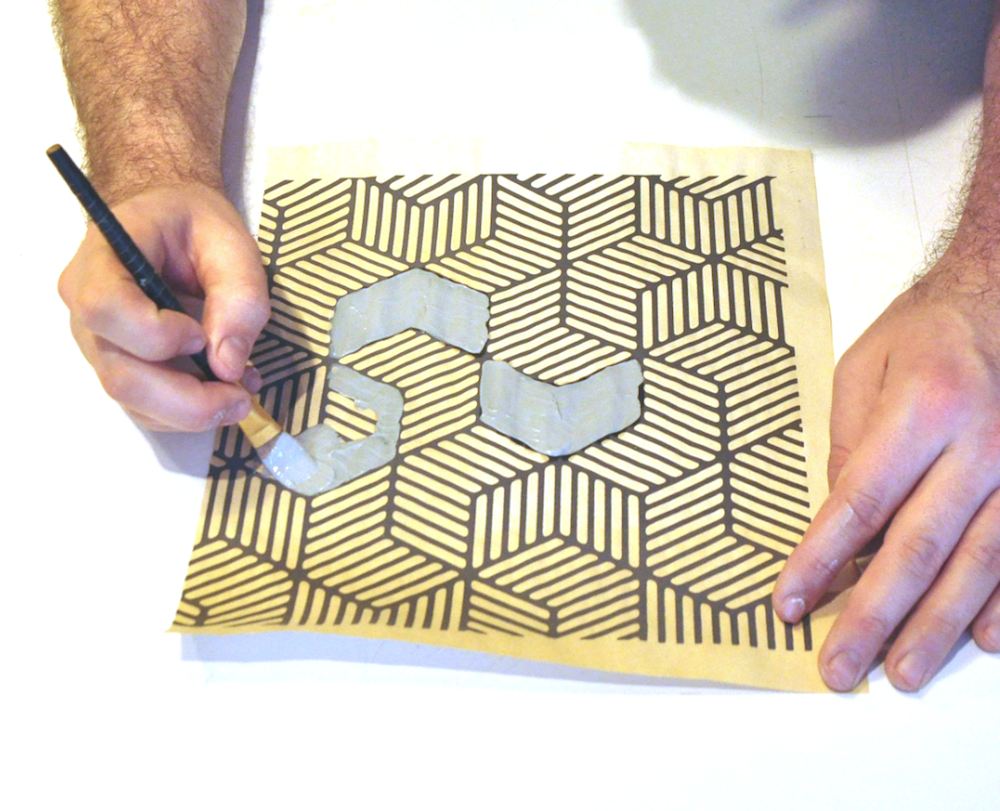
Photo I: Brushing in select areas with an alternative color

Photo J: Monoprinted Cubos transfer
CUTTING AND RESETTING PATTERNS (Coming soon!)
AFTER THE TRANSFER (Coming soon)
NOW WHAT?
You now have a screen-printed image transfer on clay! But the question now is what do
you do with this process? Try applying Isla Transfers to your figurative sculptures,
decorate a slab to use with a hump or slump mold for plates and bowls, and better yet, see
how you can apply them to your wheel thrown pottery!